This document explains the different settings available in the Preferences window of Unexpectedly.
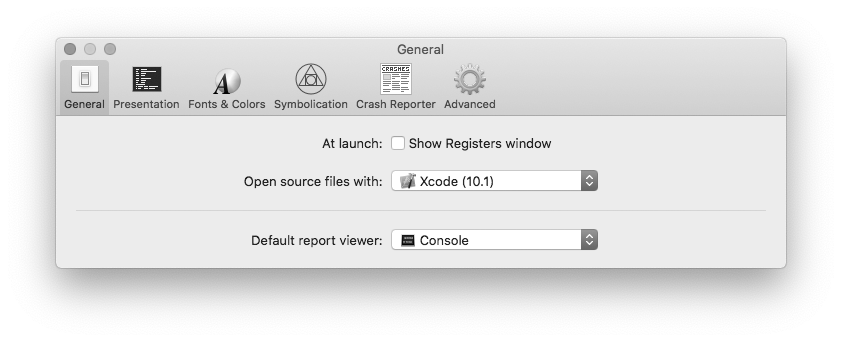
This pane lets you choose whether the registers window should be visible at the launch of the application, which application should be used to open source files or which application should be the default one at the system level to open .crash report files.
To show or hide the Registers window when you open the Unexpectedly application:
| 1 | Choose Unexpectedly > Preferences… |
| 2 | Click General. |
| 3 | Check or uncheck the "Show Registers window" checkbox. |
To change the application to use to open local source files found by the symbolication process:
| 1 | Choose Unexpectedly > Preferences… |
| 2 | Click General. |
| 3 | Choose the application you wish to use using the "Open source files with:" popup button. |
To change the default application used by the system to open .crash report files:
| 1 | Choose Unexpectedly > Preferences… |
| 2 | Click General. |
| 3 | Choose the application you wish to use using the "Default report viewer:" popup button. |
This pane lets you define which components of a stack frame should be visible in reports.
It also lets you choose whether to show line numbers, wrap text or which sections should be visible by default in text reports.
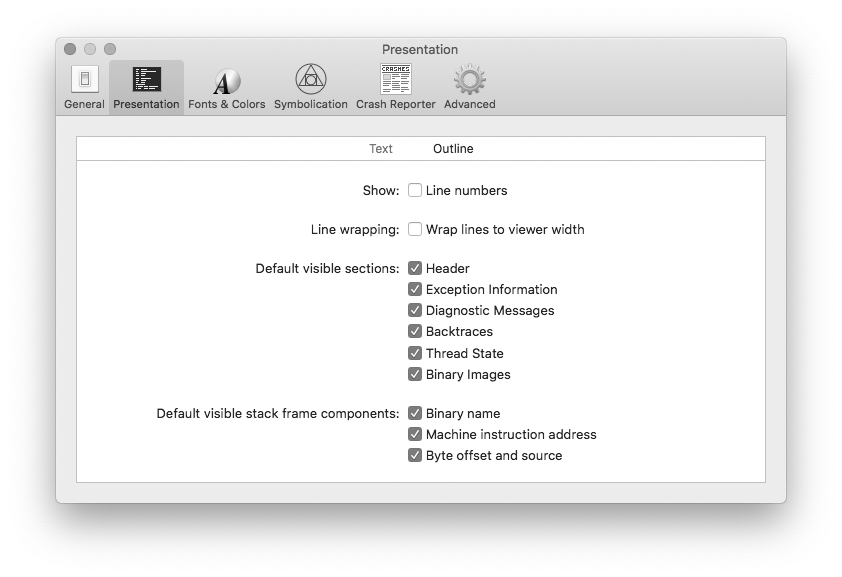
To show or hide line numbers in text reports:
| 1 | Choose Unexpectedly > Preferences… |
| 2 | Click Presentation |
| 3 | Click Text. |
| 4 | Check or uncheck the Line numbers checkbox. |
To change the line wrapping style of text reports:
| 1 | Choose Unexpectedly > Preferences… |
| 2 | Click Presentation |
| 3 | Click Text. |
| 4 | Check or uncheck the Wrap lines to viewer width checkbox. |
To set which sections should be visible by default:
| 1 | Choose Unexpectedly > Preferences… |
| 2 | Click Presentation |
| 3 | Click Text. |
| 4 | Check or uncheck the default visible sections. |
To set which components of a stack frame should be visible by default:
| 1 | Choose Unexpectedly > Preferences… |
| 2 | Click Presentation |
| 3 | Click Text or Report. |
| 4 | Check or uncheck the default visible stack frame components. |
| To temporarily show or hide sections or stack frame components of a report, use the sections filter or presentation toggles of the report contents view. |
This pane lets you select the current theme to use for textual reports, manage the themes and edit them.

A theme influences the appearance of text reports by defining which font and color should be used for each type of data, and which background and selection colors should be used.
To use a theme:
| 1 | Choose Unexpectedly > Preferences… |
| 2 | Click Fonts & Colors. |
| 3 | Select the theme you wish to use. |
To edit a theme:
| 1 | Choose Unexpectedly > Preferences… |
| 2 | Click Fonts & Colors. |
| 3 | Select the theme you wish edit. |
| 4 | Select the type of data you wish whose appearance should be edited. |
| 5 | Click the [ T ] button or the color well to edit the appearance of the data. |
To rename a theme:
| 1 | Choose Unexpectedly > Preferences… |
| 2 | Click Fonts & Colors. |
| 3 | Select the theme you wish to use as a template. |
| 4 | Click the theme name. |
| 5 | Type the new name and validate with the Return key. |
To create a new theme:
| 1 | Choose Unexpectedly > Preferences… |
| 2 | Click Fonts & Colors. |
| 3 | Select the theme you wish to use as a template. |
| 4 | Click Duplicate. |
To remove a theme:
| 1 | Choose Unexpectedly > Preferences… |
| 2 | Click Fonts & Colors. |
| 3 | Select the theme you wish to use delete. |
| 4 | Choose Edit > Delete or click the - button. |
| 5 | Click Remove. |
To export a theme:
| 1 | Choose Unexpectedly > Preferences… |
| 2 | Click Fonts & Colors. |
| 3 | Select the theme you wish to export. |
| 4 | Control-click the theme. |
| 5 | Choose Export Theme… |
| 6 | Choose the name and location and click Export. |
To import a theme:
| 1 | Choose Unexpectedly > Preferences… |
| 2 | Click Fonts & Colors. |
| 4 | Control-click a theme. |
| 5 | Choose Import Theme… |
| 6 | Select a theme file and click Import. |
Note: Theme files use the .unexpectedly-theme extension.
|
To restore the list of default themes:
| 1 | Choose Unexpectedly > Preferences… |
| 2 | Click Fonts & Colors. |
| 3 | Click Restore Defaults |
This pane lets you select whether Unexpectedly should try to resolve the symbols in the backtraces of reports and whether it should automatically look for the appropriate symbol files (.dSYM).
You can also manually add or remove symbol files from the list.
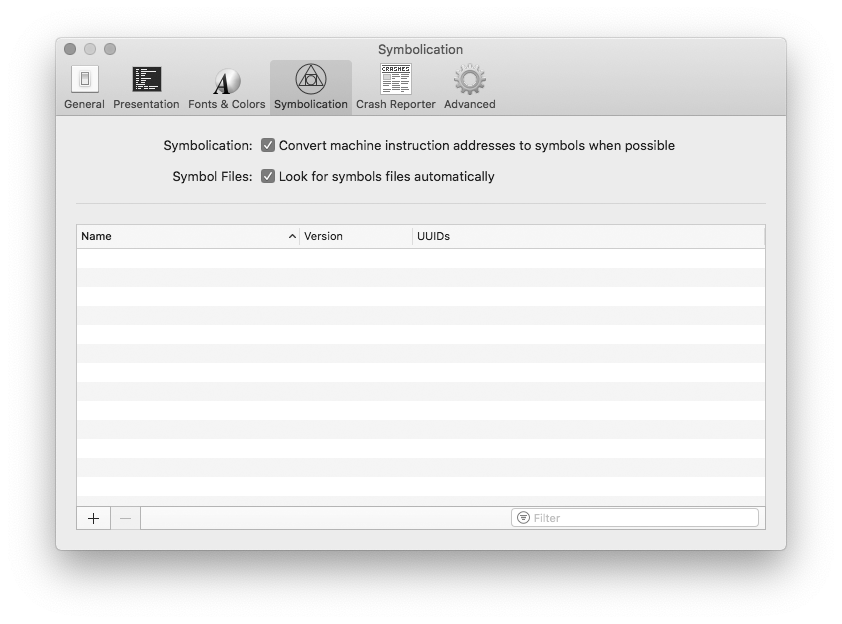
To enable or disable the resolution of symbols:
| 1 | Choose Unexpectedly > Preferences… |
| 2 | Click Symbolication. |
| 3 | Check or uncheck the "Convert machine instruction addresses to symbols when possible" box. |
To enable or disable the automatic search of symbol files:
| 1 | Choose Unexpectedly > Preferences… |
| 2 | Click Symbolication. |
| 3 | Check or uncheck the "Look for symbols files automatically" box. |
To manually add symbol files:
| 1 | Choose Unexpectedly > Preferences… |
| 2 | Click Symbolication. |
| 3 | Click the + button. |
| 4 | Choose one or more symbol files. |
| 4 | Click the Add button. |
To remove a symbol file:
| 1 | Choose Unexpectedly > Preferences… |
| 2 | Click Symbolication. |
| 3 | Select the symbol file you wish to remove. |
| 4 | Click the - button. |
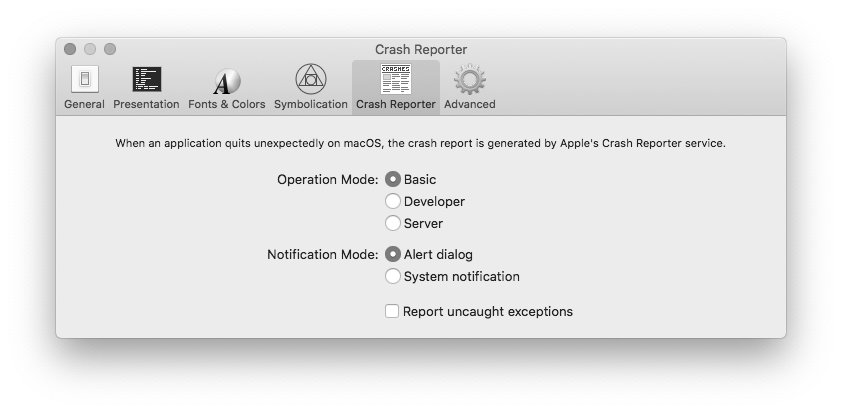
This pane lets you define if or when the "Unexpectedly Quit" dialog is displayed. It provides the same settings as the CrashReporterPrefs.app application which is part of the Additional Developer Tools (1).
| Operation Mode | Behavior |
|---|---|
| Basic | The Unexpectedly Quit dialog is only displayed for any application run by the user that crashed. |
| Developer | The Unexpectedly Quit dialog is displayed for any process (application or background) run by the user that crashed. |
| Server | The Unexpectedly Quit dialog is never displayed. |
| Notification Mode | Behavior |
|---|---|
| Alert Dialog | When an application quits unexpectedly, an alert window is displayed in the center of the main screen inviting you to report the issue to Apple. |
| System Notification | When an application quits unexpectedly, a system notification is displayed. If you click the notification, an alert window is displayed in the center of the main screen inviting you to report the issue to Apple. |
To change the operation mode of macOS Crash Reporter:
| 1 | Choose Unexpectedly > Preferences… |
| 2 | Click Crash Reporter. |
| 3 | Choose the mode from the "Operation Mode" radio buttons. |
To change the notification mode of macOS Crash Reporter:
| 1 | Choose Unexpectedly > Preferences… |
| 2 | Click Crash Reporter. |
| 3 | Choose the mode from the "Notification Mode" radio buttons. |
To also report uncaught exceptions:
| 1 | Choose Unexpectedly > Preferences… |
| 2 | Click Crash Reporter. |
| 3 | Check the "Report uncaught exceptions" checkbox. |
This panes lets you define whether Unexpectedly should automatically look for updates or whether the Debug menu should be visible or not.
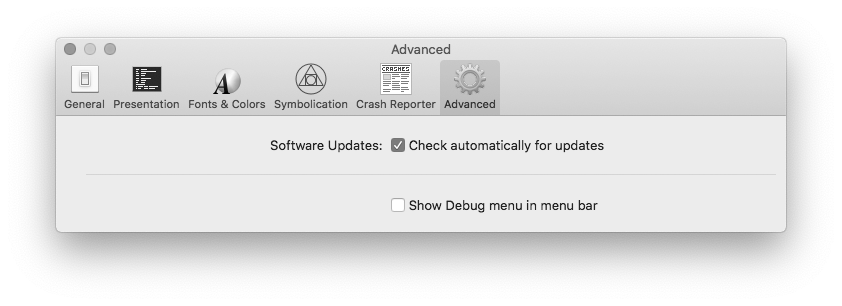
To enable or disable the automatic update checks:
| 1 | Choose Unexpectedly > Preferences… |
| 2 | Click Advanced. |
| 3 | Check or uncheck the "Check automatically for updates" box. |
To show or hide the Debug menu:
| 1 | Choose Unexpectedly > Preferences… |
| 2 | Click Advanced. |
| 3 | Check or uncheck the "Show Debug menu in menu bar" box. |
| Revision History | ||||
|