A distribution, contrary to a raw package, lets you customize what is visible to the user. You can customize the contents of some steps of the installation, the background image of the Installer window or localize the title of the distribution.
To see how to customize the Installation Type step, check the Customizing a distribution Installation Type and requirements chapter.
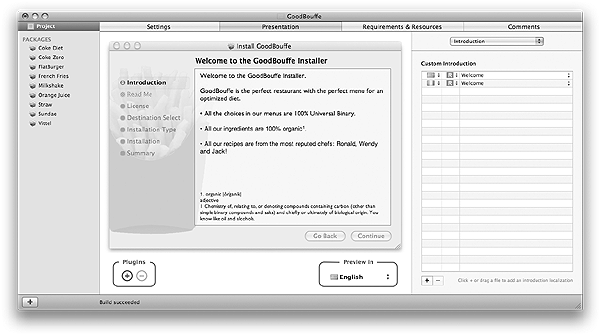
To access the Presentation tab for a distribution project:
| 1 | Choose Project > Project… |
| 2 | Click the Presentation project tab. |
The distribution title is the name that will be used to create the title of the Installer window and the title of the Introduction step. By default, there are no localizations for the distribution title and the name of the project will be used.

To add a localization for the distribution title:
| 1 | Choose Title from the Presentation inspector popup button. |
| 2 | Click the + button. |
| 3 | Type the title of the distribution and validate with Return. |
| 4 | Choose the language from the language popup button. |
To remove one or multiple localizations of the distribution title:
| 1 | Choose Title from the Presentation inspector popup button. |
| 2 | Select the localizations you want to remove. |
| 3 | Click the - button. |
| 4 | Click Remove. |
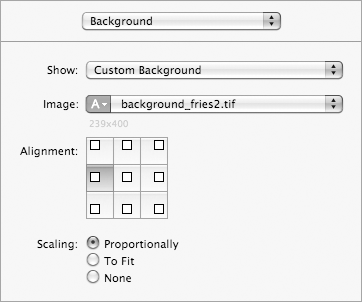
The background image is the image that is displayed in the Installer window behind the list of steps and the main pane. Packages lets you define which background imae you want to display for a distribution.
Notes and recommendations:
|
By default, the background image is the generic application icon on macOS version 10.9 and earlier, empty on 10.10 and later.
To set a custom background image:| 1 | Choose Background from the Presentation inspector popup button. |
| 2 | Choose Custom Background from the Show popup button. |
| 3 | Choose Choose… from the Image popup button. |
| 4 | Select the image you want to use. |
| 5 | Click Choose. |
| 6 | Choose the type of alignment for the image from the Alignment matrix. |
| 7 | Choose the scaling mode for the image from the Scaling radion buttons. |
To revert to the default background image:
| 1 | Choose Background from the Presentation inspector popup button. |
| 2 | Choose Default Background from the Show popup button. |
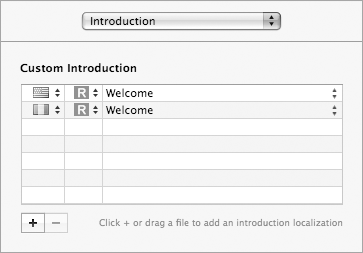
The Introduction step is the first step visible to users when they install a distribution with Installer. This step displays a message that welcomes the user or provides information. The message can be localized. Packages lets you define which message you want to present to the user by providing a text file for each localization you need to support.
Notes and recommendations:
|
By default, there are no localizations for the Introduction message and the generic message will be used.
To use a custom localized message:
| 1 | Choose Introduction from the Presentation inspector popup button. |
| 2 | Click the + button. |
| 3 | Choose Choose… from the popup button in the third column of the new row. |
| 4 | Select the text document you want to use. |
| 5 | Click Choose. |
| 6 | Choose the language from the language popup button. |
To remove one or multiple localizations:
| 1 | Choose Introduction from the Presentation inspector popup button. |
| 2 | Select the localizations you want to remove. |
| 3 | Click the - button. |
| 4 | Click Remove. |
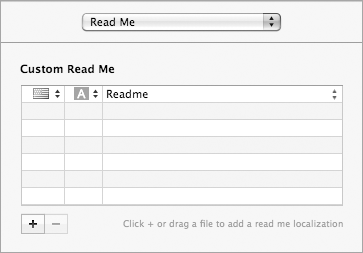
The Read Me step is the second step visible to users when they install a distribution, if a Read Me message has been defined. Otherwise this step is not displayed. The message can be localized. Packages lets you define which message you want to present to the user by providing a text file for each localization you need to support.
Notes and recommendations:
|
By default, there are no localizations for the Read Me message and so the step will not be shown to users.
To present a localized Read Me message:
| 1 | Choose Read Me from the Presentation inspector popup button. |
| 2 | Click the + button. |
| 3 | Choose Choose… from the popup button in the third column of the new row. |
| 4 | Select the text document you want to use. |
| 5 | Click Choose. |
| 6 | Choose the language from the language popup button. |
To remove one or multiple localizations:
| 1 | Choose Read Me from the Presentation inspector popup button. |
| 2 | Select the localizations you want to remove. |
| 3 | Click the - button. |
| 4 | Click Remove. |
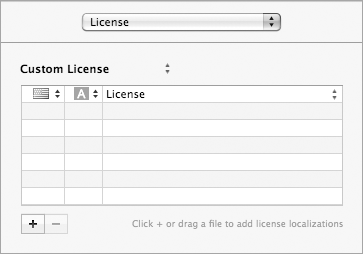
The License step is the third step visible to users when they install a distribution, if a License agreement document has been defined. Otherwise this step is not displayed. The license agreement can be localized. Packages lets you define which License you want to present to the user by providing a text file for each localization you need to support. It also offers you a list of Open Source End User License Agreements to choose from.
Notes and recommendations:
|
By default, there are no localizations for the License document and so the step will not be shown to users.
To present a localized License document:
| 1 | Choose License from the Presentation inspector popup button. |
| 2 | Choose Custom License from the popup button. |
| 3 | Click the + button. |
| 4 | Choose Choose… from the popup button in the third column of the new row. |
| 5 | Select the text document you want to use. |
| 6 | Click Choose. |
| 7 | Choose the language from the language popup button. |
To remove one or multiple localizations:
| 1 | Choose License from the Presentation inspector popup button. |
| 2 | Select the localizations you want to remove. |
| 3 | Click the - button. |
| 4 | Click Remove. |
To use a Open Source End User License Agreement provided by Packages:
| 1 | Choose License from the Presentation inspector popup button. |
| 2 | Choose the License Template from the popup button. |
| 3 | If needed, fill in the required values for the keywords. |
You can create your own License Templates. To learn more about this, check the License Templates documentation in the Packages SDK.
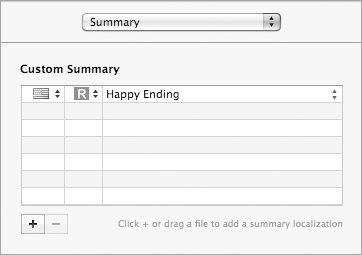
The Summary message is the message that is displayed by Installer after the installation process ends successfully (or not). This step displays a message that informs the user about the result of the installation. The message can be localized. Packages lets you define which message you want to present to the user by providing a text file for each localization you need to support.
Notes and recommendations:
|
By default, there are no localizations for the Summary message and the generic message will be used.
To use a custom localized message:
| 1 | Choose Summary from the Presentation inspector popup button. |
| 2 | Click the + button. |
| 3 | Choose Choose… from the popup button in the third column of the new row. |
| 4 | Select the text document you want to use. |
| 5 | Click Choose. |
| 6 | Choose the language from the language popup button. |
To remove one or multiple localizations:
| 1 | Choose Summary from the Presentation inspector popup button. |
| 2 | Select the localizations you want to remove. |
| 3 | Click the - button. |
| 4 | Click Remove. |
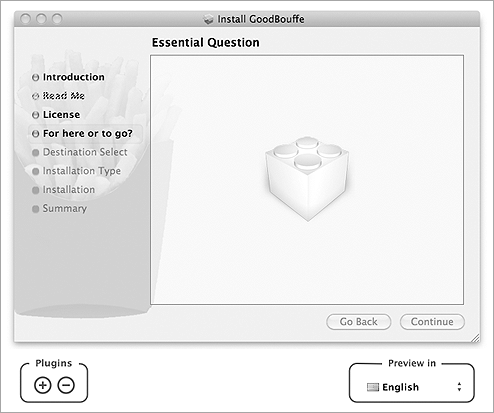
Installer supports plugins that allows you to add steps. An additional step can for instance be used to request the user to enter the license key of the product to continue the installation process. Packages lets you add Installer plugins to a distribution.
Notes and recommendations:
|
To add an Installer plugin:
| 1 | Click the Plugins + button. |
| 2 | Select the plugin you want to add. |
| 3 | Click Add. |
or:
| ▪ | Drag and drop the Installer plugin to the list of steps. |
To change the position of an Installer plugin:
| 1 | Click the appropriate step in the list of Installation steps. |
| 2 | Drag and drop the step to the appropriate location. |
To remove an Installer plugin:
| 1 | Click the appropriate step in the list of Installation steps. |
| 2 | Click the Plugins - button. |
| 3 | Click Remove. |
| Revision History | ||
|